Showing posts with label latest obsession. Show all posts

17 October 2013

More From the Grotto

I started to get some images of some of the prints today ... and discovered that everything was wrong. Still got a few shots, but not nearly as many as I have printed designs. Will have to come back to that project, with some mat board and mounting tape and a bright overcast day, and a LOT more patience.

That said, here are a few little tastes.
A tiny print, don't think the image is even 3" on a side. 

Close up of the tiny print. This image looks grainier than the actual print does. Did I mention, everything was wrong?

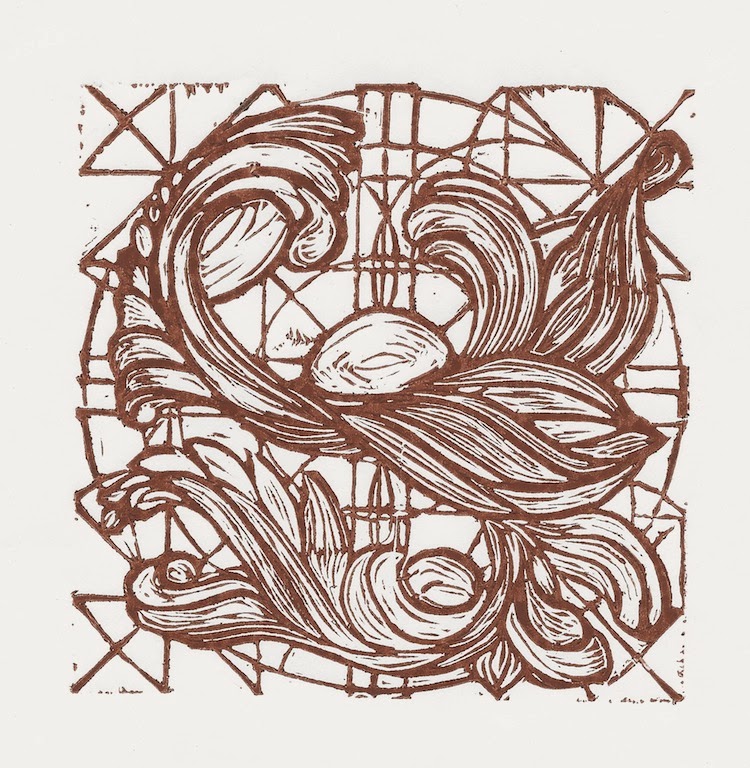
One of my recent favorites. Have done this in several colors / color combos. Can't decide which way is up, which is usually a sign that I have done something right.

Detail from the one above. 

This one is another favorite. That plate got changed many, many times, and reprinted after each change. This was my favorite iteration, but I didn't love it at the time, so I only got one good print pulled before it went under the knife again.

Same as the one I posted yesterday, in a much more ... painterly execution. Probably not finished yet, I think I want to add some highlights and outlining by hand. 
Short show & tell, I know. Next step is to get enough mat board to get them all mounted, so they look like something. Maybe even something other people would want.

15 October 2013

Printing Progress.

Block print. LDPE block, Speedball ink (elderly), generic printer paper.
My studio is gradually filling with prints. Some are much more interesting than others. This is one that I made yesterday, and love. This may be the first one that I have had little interest in re-working the block after seeing the print. I really do need to try some new ink, though. What I have seems to be almost totally lacking in whatever keeps it workable. Gum arabic? Water? Magic beans? No idea. The New Ink Smell has escaped.

... on the bright side, Akua water soluble intaglio ink actually makes pretty good block prints. Sadly, I only have black at the moment. And at $20 / pot, it is likely to remain that way for a while.

In a totally other direction, el Jefe suggests that things like this would make fantastic stained glass panels. In fact, I think he is right, and I will see about revising this into a glass pattern ... in my free time.

04 September 2013

Recent Works On Paper. With Paper. Whatever.

Various permutations of block printing and embossing. The embossing made my brain tingle a little more than the printing, but where they are combined, that was pretty sweet, too. Not as easy to see in these photos, which were made with a telephone.
A heap of attempts. Some were more rewarding than others. It is difficult to tell if the ink is dorked, it was just too hot in the studio, or I don't know what I am doing. Or, you know, All of the Above.

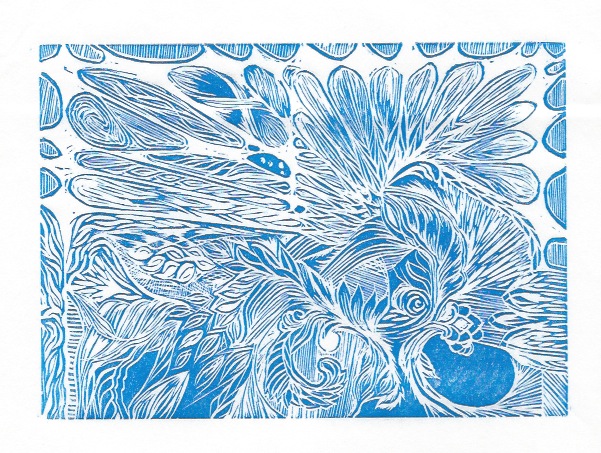
These are cool enough, I figure they deserve large size! The two images were made from the same embossing plate, but the 2nd one had more carving done to it before going through the press. 

The purple is the same plate, block printed. I think this was one of the first prints I pulled with block printing ink. I tried intalio first to see if I liked it (yeah, yeah, I *know* that is not correct usage!) and I did like it, but the photos of those prints are pretty much impossible to decipher. 

08 July 2013

Dry Point Pt 2

I made this plate today, and printed it this evening. I am pleased. (Photographs this time, rather than scans. Much better!)
First run, on heavy heavy paper.

Second run, on super light paper.

Hard to say which is "better" until they are at least both matted, if not framed. Both have pros and cons. Harder to see the pros of the 2nd print in a photo, in person it is the cleaner print. (Light conditions not exactly studio quality.)

07 July 2013

More Printing

Although things here have been a little chaotic, and also much, much too hot and dry, I have managed to get myself out to the studio a bit, and pull a few more prints. I think they are getting better, but I am no Master Printer. Yet.


This is the first print I have pulled of that acrylic dry point plate (that I posted about a couple of weeks ago). It is not so much composed as it is a collection of line sizes / weights / directions / etc. A sampler, if you will. There is so much new in this process for me that I most likely will claim every print as a test print for the next 30 years... This one looks especially funky because it does not fit totally on my scanner bed, and I did not want to mash it down, so the left side curved up and away, and seems blurry. In the actual print, it is not.


Revisiting these blocks. 

The two prints above are reprints of the same one I posted last week, with different technique, and the addition of retarder. Those both were beneficial changes to the process, I think.


This last one, however, actually has had a bunch of new cuts done to the block since last time I printed it. I tries printing this on top of prints I had already pulled (with the old cut), but this is a linocut, and the linoleum has become tremendously warped -- makes alignment / registration difficult. This print looks a little funny because the upper left corner is slightly over-inked, but also because this is a mixture of blue and black inks (plus retarder) just to see how that would go. I kinda like it, except the over-inked bit.

03 December 2012

ASUNM Sale Post-Mortem

In three days, I sold three paintings, about 30 snowflakes, and maybe 25 packets of 3 cookies (8 dozenish). I also gave away about that many cookies (as samples, freebies with other purchases, and as advertising, and as little thank-you gestures.) In the final accounting I came out ahead financially, although for the time spent, it is really of dubious value. (not even minimum wage) I certainly didn't make a substantial chunk of a year's art budget at this show, as some people clearly do.

I did get some good stuff, though.

a new experience!
rid of some of my made-things!
time to pick Jamie's brain!
two new cookie recipes!
a few new money-making ideas to chase down!
some new contacts in my field*!
three nifty reproduction prints to hang up in my naked-walled house!
some great compliments, including a marriage proposal!

* My field being People Who Make Stuff And Then Have To Figure Out How to Afford To Make More Stuff.

If you want to have any of the stuff I was selling for yourself, email me. I am working on getting stuff listed on Etsy, but it takes time, and sometimes is hard to find there. The fastest thing, and the thing I prefer, is that you just tell me what you want, we settle on a price and means of payment, and I send it to you. Because not only is that faster, but also it saves me the trouble of putting the listings together. (Administrivia is not my favorite thing...)

And, yes, I will make and ship cookies to you.

Now, here are some pictures from the three day sale, for your amusetertainment.

Five batches of cookies cooling on the counter. Left to right, PB + Mini PB Cups,  Choc Chunk + Boston Baked Beans, Tropical Mix, Bridge Mix, PB + Honey Roasted Peanuts

The final layout of our booth -- lots of stuff hung up on the backdrop, and the side fence and table moved to the back for maximum visibility from both sides. (we were in the back corner of the show)

First day arrangement - a little crowded! Impossible to tell what was going on from anywhere but straight on.

Jamie just finishing setting up on Day 1.
The long view of the hall from our booth - we were furthest from the windows, furthest from the entry doors...

Very nearly made it through the whole show without dumping all my stuff on the ground. ... but, didn't. Because my rolling cart was just not cart enough to withstand the world's most evil rumble strips.

The world's most evil rumble strips ... three rows of scattered rocks about the size of a gumball.

Anyhow, that's the round up. Out of my many, many ideas, I think the most pressingly interesting is the t-shirt printed with the Tight White Warrior Robot. Yes, there will be pictures.

22 October 2012

Now it's *really* snowing!

Although it has been a while since I posted about the snowflake project, I have been beavering away at it like some kind of an large nocturnal semi-aquatic mammal. As proof of this, I submit to you photographs. They're mostly weird angle macro photos because ... well. I am an Artiste, what can I say?

In any case, the photos are largely of snowflakes I made today, which I have just soaked in the stiffening solution and pinned out to dry. I am thinking I need to charge by the number of pins necessary to achieve the desired shape, because that seems to be the most time consuming part of this process.


Also pictured: A spinner display rack I scored at a thrift store for $6.50! Sweeet. As usual, click through to see the larger versions of these pictures. It is amazing how not-interesting glitter looks when it is sufficiently magnified!

I am not 100% on this yet, something like 92%, but I think I am also going to sell some cookies at the craft show next month. Just to see how that goes over. Assuming I can remove enough of the glitter from my person to make cookies without them being something like White Chocolate Glitter Chunk Surprise cookies.

09 February 2011

Thar she blows ...


shell marker 1
Originally uploaded by Id Marks
Here's the other bookmark that was scratching to get out. Cut by hand, needs clean up in a big way! And, I need better saw blades.

As usual, click through to Flickr for full size, and another view.

New bookmark today!

Here's one for you cephalopod fans ...


tentacle marker 3

tentacle marker 1

tentacle marker 2

The major cuts on this were done on the scroll saw, and the interior / fine cuts were done with the hand saw. Definite good marks for speed and a clean edge. The drawback to using the scroller for this is that it uses the middle inch of a 6" blade -only- leaving most of the teeth totally unused by the time the blade is worn down to the point where I can't use it on the scroll saw anymore. I did not try using that blade in the hand saw afterward, mostly because I have a good sense of what happens when you have a blade that's sharp at both ends and dull in the middle.

Hint: It's not something good!

In an act of optimism, I am leaving my set-up set up so that when I get back from running errands, I can get right back to it. There is another design in my sketchbook waiting to be released into the world! I am really looking forward to that beautiful day in the future when my obsessions get rooms of their own, and I don't have to put away my toys if I want to eat dinner.

03 February 2011

Groundhog's Day Again

That was a little joke, y'see.

Here's today's project, another prototype bookmark. Spent a lot of time doing sketches, and this is just one of the ideas I scratched out. It was easier than yesterday's, and perhaps easier than tomorrow's. I am particularly pleased with how much this one matches the sketch.

protoaction030211

Again, a prototype. A few technical details stand between me and a finished piece, not least the question of how to harden the metal. I find myself actually wondering if I can use a stand mixer in place of a polishing tumbler.

More pictures in Flickr, just click through the pic from here.

02 February 2011

back in the saddle

cicada bookmark

cicada bookmark

I have a provisional goal of doing one small project every day. I accept that this won't happen every day, but it's nice to get to the end of a day and have a Finished Thing to show for it. This is today's Thing -- a bookmark. This is made from copper, and not super-high-polish finished. It's a relatively crude prototype for the next project of the day. Tomorrow, I'll probably go in copper again. Eventually, when I'm happy with the prototypes, I'll move on to silver.

If you're interested to see some COOL metal bookmarks, try here.

17 December 2010

Old Dog / New Tricks

Took a two evening advanced course in acrylic abstract painting, with emphasis on landscape rendering. I went with a water theme, probably because I'd been listening to The Odyssey audio book all afternoon...

Although that style of painting does not especially interest me, the techniques presented did, and the instructor did a fine job of explaining them.

My canvas was, sadly, too small to try them all out at once, as most of them rely on allowing thin layers of paint dry between applications. Obviously this is tough with a small canvas! You can only get so far away from what you've just painted. Everyone else in the class was working with one or more canvasses in the 2'x3' size range, for the most part.

Here is the canvas I painted during class. Currently I have a couple of watercolors in progress, but when I have finished those, I am going to start some acrylic paintings. It seems that having a couple of canvasses going simultaneously is the cure for waiting, and I love trying new stuff. I did come out of the classes feeling pretty inspired to try these techniques, and full of ideas about how to put them to good use.

I admit it was hard not to giggle when several of the other course participants extended sincere sympathy to me, as an apparently obvious total beginner to painting. I took the small canvas (about a foot square) because I've not been feeling well lately, and didn't have a lot of energy for a large painting -- and I *hate* unfinished paintings. Also, carrying it to class and back home in the freezing damn cold on foot kinda sucks. $5 says everyone else in the class came in a car. Since I'd been doing watercolors during the day both days, I ended up painting the acrylic left-handed to give my right a break. Didn't really get into any of that with the other people in the class, though. I was just happy to be there.

There is a summer course, 3 days somewhere north of here, that I will probably sign up for, if I can work out transportation, and get registered before all the spots fill. It does look like fun.

09 November 2010

Urban Sketching

I recently came across the Urban Sketchers blog, and have been inspired to haul my sketch book around town. Normally when I see a crapload of really amazing drawings and paintings that people have the nerve to refer to as "sketches", I retreat, feeling intimidated. For some reason this site fires me up about putting marks on the page. Today I sat on a cold cement bench in front of the Schwalbennest coffee shop and made a crude sketch of it for a while, 40 minutes maybe? My fun was cut short when a delivery truck rudely pulled up right in front of me. Bugger managed to block my line of site, the bike lane, AND was parked square in front of the no-parking sign. Dude was on a roll.

Anyway, I decided that it was fun, even if the sketch isn't amazing like a lot of what's on the Urban Sketchers site. I also decided that color is pretty important to these sketches. Since even a really basic watercolor kit is more crap than I want to juggle when I go out in the world, I decided to try taking the watercolor pencils with me. That should allow me to rough in the color, work dry (makes for quick get-aways!), and not worry about spilling stuff, etc. The ability to slap the notebook shut and cheese it is important to me.

Eventually I'll start posting some of these things here. Promise. The problem isn't that I hate it or anything like that, it's more that I'm too lazy to deal with the camera and the uploading and all that. Also, I'm really focused on a textile project right now, and I'd rather put the time into that instead.

And so I am. And yes, there will be pictures of that project, too! Until then, I highly recommend you hustle over to Urban Sketchers and dig the awesomeness. I've added a link to it from here in the link list on the right, so you can get to it any time you get the urge. It's that cool.

14 September 2010

Waiting For Glue To Dry

Since I'm waiting for glue to dry in a non-euphemistic, non-metaphorical way, I thought I'd muse on some of the lessons I've learned from this project. It's not over, but since I just bribed myself to work on with an offer of a trip to the office supply if I finish it today, it must be close ('cause it's back to school sales time, squee!)...

One thing I've learned is, this is probably a prototype. I didn't start with a plan, I started with some nice plywood from the 50¢ scrap bin at the hardware store, and some shards of glass I'd painstakingly removed from a broken window here in the apartment. I had many different ideas along the way, and it moved forward very haltingly. And slowly. Part of the slowness was not actually knowing what came next, and having to have a good long think about that. I think the longest was almost a month.

If I had to build it again, by drawing a plan from what I've got now, and making a shopping list, and doing this like a proper project.... it'd most likely be a weekend project, or even just a day project, depending on what I chose to finish the wood / materials. I may test this bold claim. The closer it is to finished, the more sure I am that I can do better, faster, and with greater satisfaction at the end. I can't really 'save' this one, but I could go for a mulligan and be happy with what I get out of it. What I can't do it for is cheaper – this one is constructed almost entirely out of stuff I already had on hand, or clearance bin items. The only things I paid full price for were hardware (hinges, knob, latch).

Another thing I (re)learned is that prototypes are totally worth it. Although maybe next time I should do it in cardboard or something. In art we call that a maquette, or a 'mock up' if we're not being pretentious art school dorks.

In no particular order, further learned things:
  • cut the glass first, cut the holes for the glass after
  • hot glue does NOT work like caulking (don't ask)
  • slate is surprisingly hard to find
  • have a variety of fastening hardware on hand
  • there's a reason some kinds of hardware come in a minimum of 100 quantity
  • sand before sawing, between coats of paint, and after pulling the splinter out
  • if you think something will make a good picture, it probably will
  • measuring is not just for chumps
  • a project that won't end is hugely inspirational - I'm FULL of other ideas now!
  • cheap wood clamps are even worse than you think they'll be

Perhaps the most painful part of all this were the times I didn't have the right tool for something. Doing projects without a fully equipped shop can be fun, especially when you manage to work around a tool or process. A person can feel quite clever when Making Do. (See my contour gauge a few posts back...) but... it's those times when I'm mis-using a tool that I feel like ass. When I'm using a tool for something it was simply not intended for, and I know it. Or when I know without doubt that the problem I have can ONLY be solved by having the right tool, which I can't afford at the moment. Or that the problem I have can ONLY be solved by having a quality example of the right tool, which isn't in the stars at the moment. Those times are a bit frustrating.

26 May 2010

Art, versus something I could do and get paid for.

Last week, it occurred to me that I could probably make some money by going to the fleamarkt on a Saturday morning, picking out some little prizes, and assembling them (on the spot), and (hopefully) selling them by the end of the day. At the fleamarkt. Somewhere in the intersection of crafting, performance art, recycling, and yard sale. Also, and perhaps most importantly, it could be quite fun. The fleamarkt is basically a pre-sorted landfill, so any and every random thing I could need or want to put into a project would be there. Lamp parts, coffee pots, thermos bottles, LPs. I am very fond of this idea. The only real downside I see here is that it is juuuuuust over my introvert / extrovert threshold. I suppose it wouldn't hurt to try it once and see if I can survive it.

Ideally, I wouldn't actually go there with a plan for a finished item, just see what's there and come up with a concept on the spot. However, for a first run, I imagine a basic plan might be a really good idea, so I'll at least know what tools to take, and what to budget for materials.

Things I already know I'll need:
  • camera (for documentation)
  • something to sit on (there is a little drinking area there, that might suffice)
  • a wide brimmed hat (there is no shade)
  • some money to buy base materials
  • some courage to talk to strangers about what I'm doing / trying to sell
  • a basic tool kit (a way to cut things apart, a way to join things together, a way to clean up rough edges, a way to clean up dirty bits, a few spare parts, and whatever else seems like a good idea)
  • ... other? A bag lunch. 'cause if no one is going with me, I can't just walk away from my project to get lunch, I guess.
Does this idea sound interesting at all? The Mr. wasn't really into it, but he's not really a Maker.

15 April 2010

Progress continues!

MacBook for size reference!

I finished cutting out the individual pieces of this today. As of this moment, the plan is to shape and refine the blocks a bit before affixing them to something else. Probably another piece of wood, if I had to make a random guess. Most likely use the Dremel and other things to do the shaping. Haven't decided yet about finishing. Since it's plywood, there isn't going to be a lot of point in highlighting the wood's natural beauty, so paint might be the order of the day. If I really feel like doing a LOT of sanding, I might go for some glossy lacquer type thing.

And, yeah, before you sharp-eyed folks even ask, it is the same knot as on that painting from a couple of months back. I really like this one.

14 April 2010

New saw, new project, new hopes and dreams.


New saw showed up yesterday, new project started today. I'm having fun, and looking forward to seeing how this turns out. I don't know why, but it really amuses me that the saw has a pictogram of a person reading a book. This must be my saw....

ETA - already had to play a round of Digging Through The Vacuum Bag To Find That Piece I Didn't Mean To Suck Up But Did. I hope I don't have to play THAT game again any time soon. Yech.

30 March 2010

A Sad Day

I had to return the scroll saw, it was crap. I need a good scroll saw. I am very disappointed.

01 February 2010

OK, so I lied.

Weeks ago, I made a noise about uploading some pictures of my recent design projects. And then I didn't do it. This should come as no surprise to anyone who has been keeping up with this blog...

Anyway, I took a bunch of pictures today, and as it always does, that made me want to work on some projects I'd done designs for and not actually made an object with.

The picture here is a sheet of embossing foil that I've drawing a bit of knotwork on/into. It's far too flimsy to do anything with, and also I've poked a bunch of holes it in with my embossing stylus. (Not to be confused with an out-of-ink ballpoint!)

Anyway, while I was playing with that, I figured it might be fun to make some kind of low relief thing like this, and then fill it with wax or plaster, making a small shiny object. I did some trials, to test the level of detail and so on, and even poured wax in, and got some small shiny objects out. So there is definitely more coming on that front. However--there are no pictures of that trial run, because I tossed all the 'evidence' in the trash. Scented votive candles are not the right source of wax for this kind of thing.

This was sort of meant to be a bookmark or something, but I'm not satisfied with it, so, it's probably going on the vast heap of Projects Which Taught Me Valuable Lessons About Something.

29 January 2010

Progress on the storage box

I'm still working on the box to store art supplies in, it's taking a lot of layers of paint, but is starting to come together. Couple more bits of paint (white and color), and then a couple of layers of polyurethane so it is sealed and relatively defended from dings.

And then! Assembly. With little wheels. And a lid. And more pictures.